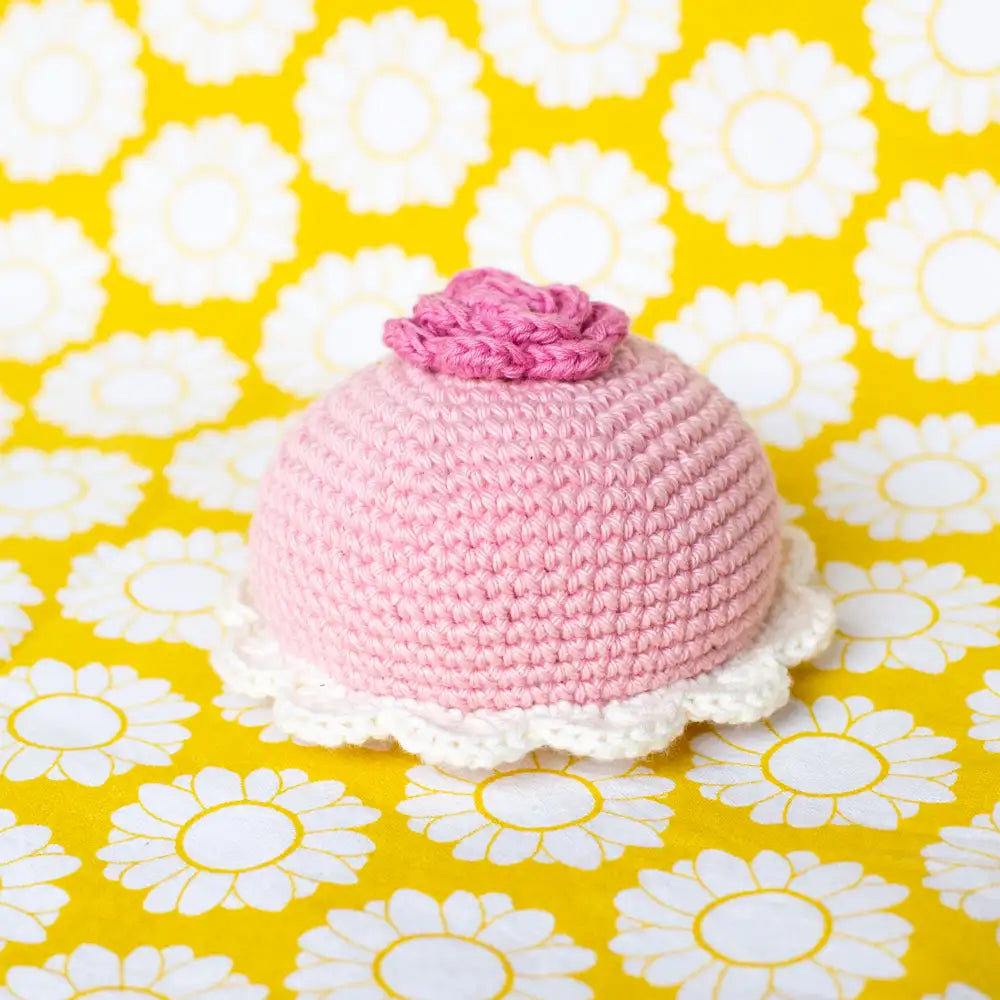
PRINCESS CAKE | Free crochet pattern
Share
There's always something to celebrate! Today I'm sharing with you this free crochet pattern for this super cute princess cake. It's a super quick and easy make and I bet your tiny humans will love it!
This cake is perfect as a pin cushion, play food or as decoration. Can you help me come up with more ideas on how to use your princess cake?


INFORMATION
DESIGN
Veronica Lönnqvist (2020)
COPYRIGHT
© 2020 Garnknuten . Veronica Lönnqvist - All rights reserved. This pattern is for PERSONAL USE ONLY! The pattern (or parts of it) may not be reproduced, distributed or resold, translated, published, altered, shared or posted (for sell or for free) over the internet or offline! You can sell items made from this pattern, if they are handmade by yourself in a limited number and you give credit to the designer. Please add the following text to your item description and any item you are selling: ”This crocheted product is handmade by ...(your name)... from a design and pattern by Garnknuten . Veronica Lönnqvist / www.garnknuten.com”
MATERIAL
Yarn: ex. BC Garn Alba 50g = 160 m
Crochet hook: ex. 3.00 mm
Stuffing Scissors
Tapestry needle Pins
GAUGE
28 sc stitches on 10 cm.
30 rows on 10 cm.
ABBREVIATIONS [US-terms]
- Click on the (pink) stitch to go to the video tutorial.
r = row, st = stitch, sl st = slip stitch, ch = chain stitch, sc = single crochet, hdc = half double crochet, dc = double crochet, inc = increase, dec = decrease


PRINCESS CAKE PATTERN
TOP PIECE
- The top piece is crocheted in spiral with light pink and white yarn.
- Start to crochet with the pink yarn.
r 1: 2 ch, 6 sc in the second chain from the hook. (6) = magic circle
r 2: [inc]x6. (12)
r 3: [1 sc, inc]x6. (18)
r 2: [inc]x6. (12)
r 3: [1 sc, inc]x6. (18)
r 4: [2 sc, inc]x6. (24)
r 5: [3 sc, inc]x6. (30)
r 6: [4 sc, inc]x6. (36)
r 7: [5 sc, inc]x6. (42)
r 8: [6 sc, inc]x6. (48)
r 9: [7 sc, inc]x6. (54) r 10: [8 sc, inc]x6. (60)
r 11-18: 60 sc. (60) Change colour to white.
r 19: [4 sc, inc]x12. (72)
r 20 (front loops): [skip 2 st, 7 dc, skip 2 st, sl st]x12.
- Cut of the yarn and fasten the ends.


BOTTOM PIECE
- The bottom piece is crocheted in spiral with white yarn.
r 1: 2 ch, 8 sc in the second ch from the hook. (8) = magic circle
r 2: [inc]x8. (16)
r 3: [sc, inc]x8. (24)
r 4: [2 sc, inc]x8. (32)
r 5: [3 sc, inc]x8. (40)
r 6: [4 sc, inc]x8. (48)
r 7: [5 sc, inc]x8. (56)
r 8: [6 sc, inc]x8. (64)
r 9: [7 sc, inc]x8. (72)
- Cut of the yarn and save approx. 30 cm.
- Fasten the other end.


ROSE
- The rose is crocheted with a darker pink.
- Always ignore the sl st at the end.
r 1: 2 ch, 8 sc in the second ch from the hook. sl st. (8) = magic circle
r 2 (front loops): [skip 1 st, 5 dc, skip 1 st, sl st]x2
r 2 (back loops): [inc]x8. sl st. (16)
r 3 (front loops): [skip 1 st, 5 dc, skip 1 st, sl st]x4
r 3 (back loops): [sc, inc]x8. sl st. (24)
r 4 (front loops): [skip 1 st, 5 dc, skip 1 st, sl st]x6
- Cut off the yarn but save approx. 20 cm.
- Fasten the other end.
ASSEMBLING
- Attach the rose to the top piece.
- Sew the top and the bottom piece together. Stuff the cake before closing the last stitches.
- Sew the top and the bottom piece together. Stuff the cake before closing the last stitches.
- Fasten the end.
- Wohoo you made it!!
If you enjoyed making this amigurumi you might also enjoy my other designs. You’ll find more amigurumi patterns here.


2 comments
Hi Christine! I’m so excited for your project – I think it will turn out amazing!!
I want to make this as a hat! I may need to size it or down up a bit, but I’m so excited to make this!