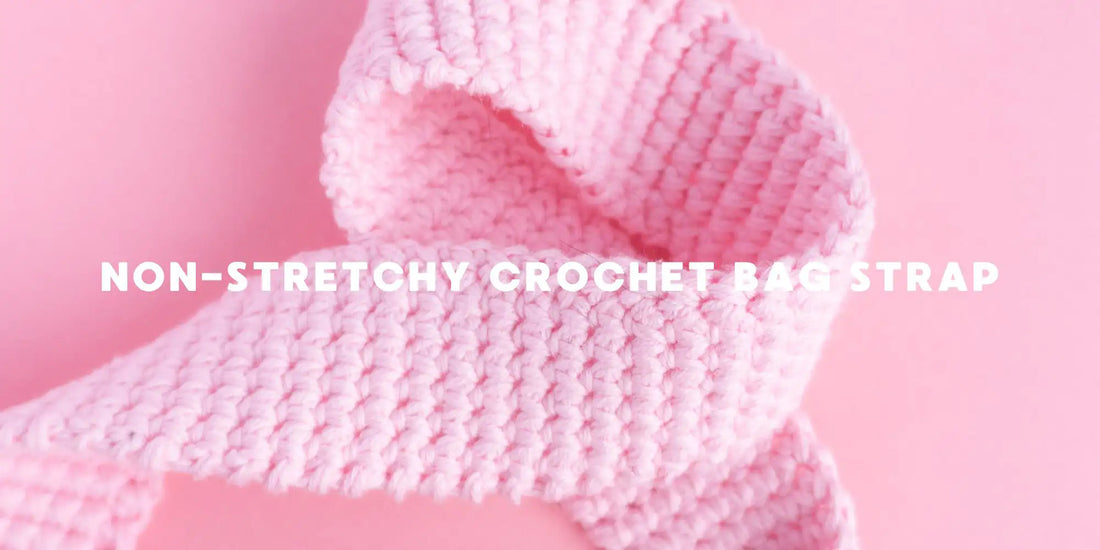
How to crochet a non-stretchy durable bag strap
The secret behind a non-stretchy crocheted bag strap
We all know how frustrating it can be when your beautifully crocheted bag strap stretches and becomes too long. This is especially common if you're carrying heavy items like books or groceries. If you're tired of your crochet bag straps losing their shape, you’re in the right place! In this post, I’ll share my favorite method for crocheting a non-stretchy bag strap. By alternating single crochet stitches with slip stitches, you can create a durable strap that stays in place no matter how much you use it.
In this blog post, I’m sharing my favourite method for crocheting a non-stretchy (and durable) bag strap. I've also included the free pattern for my all-time favourite bag strap below for you to try. If you make one, please tag me in your pictures (@garnknuten)!

Why Single Crochet Bag Straps Stretch and How to Fix It
There are many different ways to crochet bag straps, but one of the most common methods is to crochet single crochets back and forth until you've reached the desired length. The problem with only using single crochet stitches is that they will start to stretch over time, especially if you're using the strap on a large bag and carrying heavy items like books or groceries. The key to preventing this is to alternate single crochet stitches with slip stitches. The slip stitches help the strap maintain its shape and resist stretching.
Here’s a practical example of how to alternate single crochet and slip stitches to create a non-stretchy bag strap. These rows are borrowed from my favorite bag strap pattern, which is featured in several of my crocheted crossbody bags, such as Wally the Whale bag, Casper the Crab bag, and Artur the Frog bag.
 My favorite animal crossbody bags, Wally the Whale, Casper the Crab and Artur the Frog.
How to crochet a durable and non-stretchy bag strap (instructions)
ABBREVIATIONS
r - row
ch - chain stitch
sl st - slip stitch
sc - single crochet
(x) - the amount of stitches at the end of the row
New to crochet? Click here to find tutorials on how to crochet these stitches.
START: ch 8. (8)
r 1: 7 sc. ch, turn. (7)
r 2: 7 sl st, ch, turn. (7)
r 3: 7 sc in the same sc as you crocheted the sl st on the previous row, ch, turn. (7)
Continue repeating rows 2-3 until your bag strap reaches the desired length. You can easily adjust the width of the strap by increasing or decreasing the number of chains at the start.
New to reading crochet patterns? Click here to check out my free guide on How to Read Crochet Patterns.
My favorite bag strap is a combination of this flat strap and a crocheted cord that I tie into knots at both ends. I’ve used this style for all of my crossbody bag designs, and I’m obsessed with how it looks. I also love that you can easily switch the straps between bags using carabiner hooks, and slightly adjust the length of the strap thanks to the knots at each end.

Carabiner hook attached to the loop knot at the end of a crocheted non-stretch bag strap.
Free non-stretchy crochet bag strap pattern
- The finished bag strap measures approx. 65 cm.
- I've crocheted this bag strap with double-stranded sport-weight yarn (Alba by BC Garn 50 g = 160 m).
Beginning part
r 1: 2 ch, 7 sc in the second chain from the hook. (7) = magic circle
r 2-100 (99 r): 7 sc. (7)
Middle part
- Continue crocheting the middle part back and forth.
r 101: ch, turn. 7 sl st, ch, turn. (7)
r 102: *7 sc in the same sc as the sl st on the previous row, ch, turn. (7)
r 103: 7 sl st, ch, turn. (7)*
r 104-260 (157 r): Repeat *-* a total of 80 times. (7)
- If you want a longer bag strap, add more repeats here.
End part
- Continue crocheting in the round.
r 261-360 (100 r): 7 sc. (7)
- Cut off the yarn, close the hole by weaving through the front loops of the stitches and weave in the ends.
- Tie a loop knot in both ends of the bag strap.
- Attach the carabiner hooks to the loops.
 Crocheted Candy Cane crossbody bag with a non-stretch bag strap in pink.
Common Mistakes When Crocheting Bag Straps (and How to Avoid Them)
1. Using Only Single Crochet Stitches
Mistake: Many crocheters tend to (by default) use single crochet stitches for bag straps, but this stitch can stretch significantly over time, especially when the strap is subjected to weight.
How to Avoid It: Alternate between single crochet stitches and slip stitches. Slip stitches help prevent stretching and maintain the shape of the strap, making it more durable.
2. Choosing the Wrong Yarn Type
Mistake: Some yarns are more prone to stretching, especially lightweight or stretchy materials like acrylic or wool blends. These might cause your bag strap to extend after repeated use.
How to Avoid It: Use sturdy, tightly spun yarns such as cotton or linen blends for better durability. For added reinforcement, consider using a yarn with minimal stretch or line the strap with fabric or a woven strap.
3. Not Adjusting Hook Size
Mistake: Using a hook size that is too large can lead to loose stitches, which will stretch more easily. On the flip side, a hook that’s too small can make the strap too stiff or hard to work with.
How to Avoid It: Use a hook size that provides tight, firm stitches without being too difficult to crochet. A tighter tension will reduce the likelihood of stretching.
4. Not Measuring Properly Before Finishing
Mistake: Finishing the strap without accounting for potential stretch can result in an overly long strap, especially after some use.
How to Avoid It: Measure the strap while keeping in mind that it might stretch a little over time. Consider making the strap slightly shorter than desired to accommodate for future stretching, especially if you're using a more flexible yarn.
5. Overloading the Bag
Mistake: Using a crocheted bag strap on a heavy bag (like one filled with groceries or books) without reinforcing the strap can lead to stretching and wear.
How to Avoid It: While slip stitches can help reduce stretching, it’s important to match the strap with the bag's intended weight. For heavier bags, consider doubling the yarn or adding an internal strap made of non-stretch material (like cotton fabric or leather) for extra support.
6. Not Securing the Strap Ends Properly
Mistake: Weak or insecure strap ends can cause the strap to stretch or break over time, especially where the strap connects to the bag.
How to Avoid It: Ensure that the strap ends are securely attached to the bag. You can reinforce these areas by adding extra rows of slip stitches or by sewing the ends to a sturdy attachment like a metal ring or carabine hook.
Final Tip:
Take your time when working on bag straps! Even though they may seem like a simple component, a well-made strap can make all the difference in the durability and comfort of your bag. By avoiding these common mistakes, you’ll create a stylish and functional bag strap that stands the test of time.
If you found this tutorial helpful, please share it with your
crochet friends or on social media! ❤️


2 comments
Yes, it can be a little bit tricky, but notice that you don’t crochet in the slip stitches but in the single crochets on the r before the slip stitches. This way you cover up the sl st and you get the pretty fabric. ^^
Here’s a video where I show how I do it. https://www.instagram.com/reel/DYRHv8-Cwm2/?utm_source=ig_web_copy_link&igsh=MzRlODBiNWFlZA==
A longtime textile artist finding that no matter how loose the slip stitches are done, the next row of sc is difficult.