AMIGURUMI OWL | Free crochet PDF pattern
Share
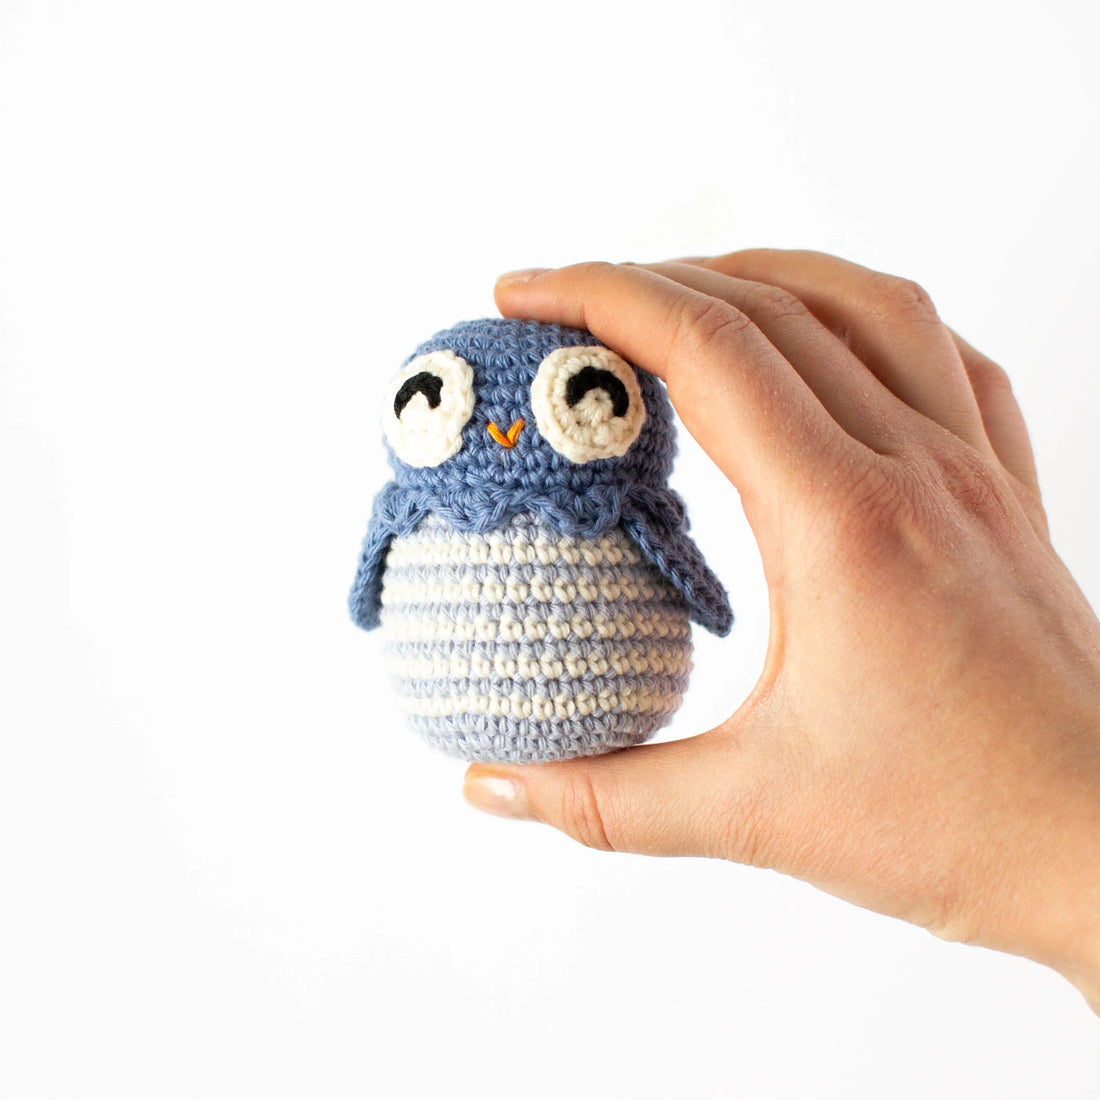
In this blog post, you'll find the free PDF crochet pattern and step-by-step instructions for this cute amigurumi owl. Bob the owl is an adorable little amigurumi that is fun to give away but even more fun to crochet!
Down below you'll find the complete pattern and also a link to the free PDF file which includes more step-by-step pictures that will smoothly guide you through the making process. Bob the owl is one of my most popular happy amigurumi patterns so far and over 1200 people have so far downloaded the pattern. I hope you'll enjoy making him too!
DOWNLOAD THE FREE PDF PATTERN HERE!

BOB THE OWL - Free crochet pattern
ABBREVIATIONS [US Terms]
Click on the (underlined) stitch to go to the video tutorial.
r - row
st - stitch
ch - chain
sl st - slip stitch
sc - single crochet
hdc - half double crochet
inc - increase
dec - decrease
bl - back loop
fl - front loop
cc - colour change
[…]x… - repeat the instructions in the brackets x-times
(…) - the number of stitches at the end of the round.
Tip! I've made beginner-friendly video tutorials on basic crochet stitches. Click on the name of the stitch to go to the video!
MATERIALS
- Cotton yarn (50g = 160cm)
- Crochet hook size 3 mm
- Stuffing
- Needle
- Scissors
- Pins (optional)
- Stitch marker (optional)
COLOR KEY
B - Light blue
C - White
D - Black
E - Orange
DOWNLOAD THE FREE PDF PATTERN HERE!

INSTRUCTIONS
HEAD
r 1: 2 ch, 6 sc in the second chain from the hook. (6) = magic circle
r 2: [inc]x6. (12)
r 3: [1 sc, inc]x6. (18)
r 4: [2 sc, inc]x6. (24)
r 5: [3 sc, inc]x6. (30)
r 6: [4 sc, inc]x6. (36)
r 7: [5 sc, inc]x6. (42)
r 8-12: 42 sc. (42)
r 13: [5 sc, dec]x6. (36)
r 14 (fl): [skip 1 st, 5 hdc in next st, skip 1 st, sl st in next st]x9. (9 hdc groups)
- Cut off the yarn and fasten the ends.
BODY
r 1: 2 ch, 6 sc in the second chain from the hook. (6) = magic circle
r 2: [inc]x6. (12)
r 3: [1 sc, inc]x6. (18)
r 4: [2 sc, inc]x6. (24)
r 5: [3 sc, inc]x6. (30)
r 6: [4 sc, inc]x6. (36)
r 7: [5 sc, inc]x6. (42)
- Change colour in between every row to make the body striped.
r 8-17: 42 sc. (42)
r 18: [5 sc, dec]x6. (36)
- Cut off the yarn but save approx. 30 cm so that you have something to attach the head to the body with.
- Fasten off the other yarn end.
WINGS x2
r 1: 2 ch, 4 sc in the second chain from the hook. ch, turn. (4)
r 2: [inc]x4. ch, turn. (8)
r 3: [1 sc, inc]x4. ch, turn. (12)
r 4: [2 sc, inc]x4. ch, turn. (16)
r 5: [3 sc, inc]x4. ch. (20)
- Crochet 11 sc along the straight edge of the wing.
- Cut off the yarn and fasten the yarn ends.
EYES x2
- End each row with a sl st in the first stitch of the row and a ch. These stitches are not counted for at the end of the row.
- The new row always starts in the same stitch as the sl st.
- Start to crochet with colour C.
r 1: 2 ch, 8 sc in the second ch from the hook. sl st, ch. (8) = magic circle
r 2: [inc]x8. (16)
- End the row with an invisible join.
- Cut of the yarn, but save approx. 20 cm so that you have something to attach the eyes to the head with.
- Fasten the other yarn end.
- Embroider or sl st crochet a black U on each eye.
ASSEMBLING
- Stitch down the scalloped edge.
- Attach the eyes to the head with 3 sc in between them.
- Embroider a beak between the eyes on row 11.
If you enjoyed making this amigurumi you might also enjoy my other designs. You’ll find more amigurumi patterns here.
Happy crocheting!
